Saturday, November 26, 2011


I had considered the issue of using an auger bit for counterboringing a hole. The method that occurred to me was to place a pilot over the screw point to guide the bit in the center of the original hole.
I have tried using auger bits with damaged or less than stellar threads on the screw point. I found that they tend to stop cutting a few turns after the spurs have bottomed out and the radial cutting edges engage.
 
While randomly surfing the web tonight I find that once again what I thought was a new idea had been thought of before.
 
At the bottom of the page is a catalog listing for “Old Tools of course”.
Near the upper right side of page are Auger Bit Guides.
 
At the bottom of the catalog page under the heading “An Old Fellow” the writer suggests that the Irwin Style bit is an idea that had been thought of before also.
 
As he says “There is nothing new under the sun.”
 
Dave N.
aka Old Sneelock

Saturday, October 1, 2011

Midwest Foundry

Now I know which Local I worked for back in 1969. In an earlier post I told you that I hired in at the Midwest Foundry. To work there I had to join the union. The Local 118.
Now I want find out if I can get a pension for the time I spent there. 

Monday, September 19, 2011


On the Old Tools List there was a discussion of how to create a Moxon vice. As always there are a great many good ideas and a few that are excellent.
I don’t claim this one as excellent but perhaps elegant in its simplicity.
Rather than using screw threads with all their attendant complexity of manufacture or procurement I’m suggesting an alternate method of using hold downs to provide the clamping pressure. 


Monday, August 8, 2011

Midwest Foundry in Coldwater, Michigan

When I graduated from Coldwater, High School, in June of 1969, my father had a plan. On the first of October in 1969 I would turn 18. He set out to insure my future. On my birthday Dad said I got you a job at the foundry.
Dad was employed at Midwest Foundry from 1951, the year I was born, until 1986, the year my son was born. He was a member of the union and served as union secretary for several years. He considered the job as his best hope for the future and wanted it to be mine also.
Now I come to the issue at hand. I worked for the Midwest Foundry for 3 1/2 years. During that time I paid into the pension plan. I'm now able to draw on that plan but I need to know the number of the Union Local that represented me. Unfortunately I can't remember what that number is and without it no pension. Dad and Mom have both passed and my family draws a blank on this one too. The Union Hall was at 93 East Park Ave, Coldwater, MI. Right across the street from the Midwest. It's ironic that it was about 3 houses down from my parents house, where I lived from 1962 until 1973.


Can anyone help me with this one?

Wednesday, July 27, 2011

BRING OUT YOUR DEAD - Repairing a smashed chisel socket.

Joe sent me a chisel. 
Why did Joe send me a chisel? 

Well Joe had a problem. 
On the 'Old Tools'<oldtools@ruckus.law.cornell.edu>; mailing list of which I am a proud member Joe sent out the following:
I've got a 3" slick (Ohio Tool Co) with a socket that is beyond
de-mushrooming. It needs the TLC of a skilled blacksmith. Someone on
this list actually has repaired/replaced such a socket and posted about
it - with pictures no less. But I can't find the name/site. I really
have no need for a 3" slick, but it's sitting there mocking me and that
just has to stop.

Anybody out there with the tools and skills to rebuild this thing for me
(at a reasonable price please!)?

Here's a couple pics of the current damage. There's 1" of socket
remaining, and the curled over end of what used to be another 1/2" or
so. The fat stuff looks to be some sort of cloth tape and although my
blacksmith skills are severely limited, I'm guessing that it holds no
structural value and could probably be removed.

http://www.joesbucketorust.com/images/OTList/OTC%20Slick%203.JPG

http://www.joesbucketorust.com/images/OTList/OTC%20Slick.JPG

Joe M.
Because the Old Tool List is a great collection of guys and gals who share their opinions, ideas, and a vast quantity of helpful advise with anyone who asks and sometimes before they think to ask Adam replied:

I sent this link to Joe this morning, but forgot to copy the list.  Dave
Nighswander posted a great series of pictures on a socket chisel repair
job (one year ago today, strangely enough):

http://swingleydev.com/archive/get.php?message_id=205490&submit_thread=1#message

The links are split in the archives, so here's the photo page on GIC:

http://tinyurl.com/3vdpxts

--
Adam
Port Angeles, WA

Joe sent me a chisel. 

Actually Joe sent me two chisels. The top one is the Ohio Tool 3" chisel. The design is what is called a firmer chisel because it has squared off edges. The tool is made from wrought iron and a hardened tool steel blade that is welded on the business end. The bottom one is a hitchhiker that Joe sent along as a practice piece.

How does a person go about repairing a mushroomed socket chisel? First I find out what it's supposed to look like by verifying what it is.


Then I try to match it up against a pattern that is similar.


In this case it is an old unnamed chisel that resides in my chisel drawer. The the remaining section of socket on the Ohio Tool matched the taper on the no name socket. I had my pattern.
Then I need a mandrel to form the socket over. After looking through my various neatly arranged collections of miscellanious iron shapes, the scrap pile, I determined that I didn't have any object with a matching taper. I did have a rather large bar of iron that used to be a car axle. See dear I told you I would need it someday. It just needs to have a special taper on the end. Not to worry, I have a lathe and I get to claim another reason for owning said lathe.


But first I have to shorten the bar enough to fit in the lathe. I made a rather pointed argument about my feelings for hacksaws in another forum. (Old Tools) Put on your safety glasses the sparks are flying.


Now all I need to do is chuck up the piece, center drill it, and turn it to the proper size and angle.
If you are really fascinated with South Bend Model C 9" lathes then go here: 
http://tinyurl.com/448gjtl
Otherwise go to the next picture.


Now all it needs is a 1" square shank welded on so it will fit in the hardy hole in the anvil or in the post vise in this shot.


With the mandrel made I heated the mushroomed area with an acetylene torch. The size of the chisel dictates the amount of heat needed to get the socket up to yellow where it can be reshaped. With this big of a part that little hardware store propane torch just won't cut it. On a really big object the gas forge will work quite well. If necessary the coal forge can be used but in this case it isn't needed.

(Sorry guy's I'll have to fire the cameraman. He forgot to turn it on for this step.)

After heating the curled edges of the socket the metal is pulled and hammered back into a semblance of it's original shape. Sometimes there is enough metal left to reform the entire socket. Sadly in this case there wasn't. The material had been stretched and hammered over the years until there was only 3/4" of usable socket left. 
A donor piece was found, I told you I was going to need that, and welded on the chisel. Before you ask: Yes, it could have been forge welded. I'm not a fanatic about blacksmithing with only traditional tools. Yes I do have a coal forge, anvil, post vise, tongs, hammers etc just like they had in 1860. I also have arc welders, torches, lathes, and abrasive cutoff saws. I use what works.


After heating the two welded parts, hammering them into shape, grinding and filing the socket, the chisel is back to working condition. 


I sent Joe back his chisel. 

Let's see I think I can find something else to do but then jobs just seem to show up. Maybe I'll wait and start in the morning.

Saturday, June 11, 2011

Learning Curve


Today I spent an hour or so trying to work thru another learning curve.
Several years ago I tried sharpening one of my Grandfathers saws. I had little experience and no real training. My pitiful attempt created the expected result. I have since learned that the tooth configuration left on the poor thing is called cows and calves. 
Since then I have sharpened drills, chisels, planes, screwdrivers and myriad other edged devices but never another simple straightforward carpenters crosscut saw. 
I ran into my friend Sam a month ago. He congratulated me on my blog entries about sharpening auger bits. Then he said what I should really do is make a video about saw sharpening. 
I reread my sharpening books, studied videos, and went through the Galoot Central postings and pictures. The advice I gleaned from all this effort was to start with a rip saw, preferably one with a coarse tooth pattern.
Two weeks ago I was happily sorting through the remains of an estate sale and found a unnamed and badly abused rip saw with 5 points per inch. The potential victim and another crosscut saw followed me home.
Today I clamped up the victim between two boards, picked out a three cornered file, blackened the teeth and set file to metal. I ended up filing each tooth 1 stroke each over 3 passes and testing between passes. 

Not perfect but respectable results this time. Now on to crosscuts. I only have 10 or 12 to practice on.

Monday, May 30, 2011

On becoming Old Sneelock


Carving My Niche

A few years ago I was playing around with a small jack hammer I had repaired and carved our street number in a rock. I was surprised at how easily it went and being pleased with the outcome, I showed my lovely wife Lydia.

She placed it at the end of the walk up to the house. The 911 commission immediately changed our street number from 658 to 663. We flipped the rock over and went on to other things.


I had forgotten about the whole thing, when she asked if I could carve another rock for her. She and her friend Kathy had arranged for a Christmas gift exchange. The rules were that the gifts had to be hand made, without spending any money.

I had 2 weeks or so to come up with something.  I cast around for ideas and came up with a fairly nice rock to work with. (Christmas! SNOW everywhere. What was she thinking?) Using my Dremel rotary tool and a dozen or so abrasive wheels, I had engraved the rock with “Kathy’s Garden”.  I finished it with a small daisy and a few curlicues around the border to frame it, just in time for Christmas.

It was a big hit with Kathy and I thought that was the end of it.

--Sorry no picture--

My next commission was a rock for Lydia’s garden. Are we seeing a pattern here?

Lydia’s rock was to say “Follow Your Bliss”. She had picked out a rock of just the right type and kind. Following her careful direction, I laid out the letters on the rock and began carving. The rock is a type that locally is called Pudding Stone. It’s a sedimentary rock made of limestone with smaller rocks embedded in it like raisins in a pudding. Just under the “F” was a piece of Calcite. I didn’t know it until I started trying to cut the stone but Calcite is HARD. 20 diamond points, and a day later, I had finished Lydia’s rock.


Now I was hooked. I had a process, the tools, and the talent. All I needed was an inspiration.

My sister Peggy asked me for a marker for her dogs resting place. I completed it and she was very happy with it.

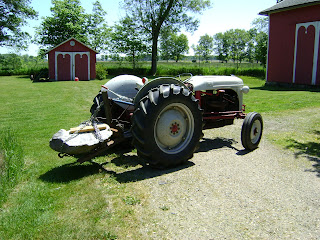
I have a collection of old farm equipment, mostly tractor related, but quite a varied group. My favorite one is my old Ford tractor so I engraved a rock to commemorate it.


I went on to engrave rocks with other trade names, the International IH logo and name, a couple of John Deere’s running deer, and an Oliver shield and name. By now I had engraved rocks scattered all over the yard, and several in surrounding counties. Just to see what would happen,I put all of them up for sale at my sister’s and her husband’s greenhouse, except the Ford Rock, and sold them all too unsuspecting customers.


.
I dabbled in base relief with a robin and a squirrel, but didn’t like the outcome

Lydia liked them and put them at the entrance to the sidewalk.

Lydia again called on my talents for gifts for her seminary class members. They had all signed a mouse pad for each of the class members so for Christmas I engraved a small rock for each of them with a copy of their signature. The rocks were small so we could mail them rather than shipping them freight. J

My biggest engraving project to date was putting the name of our farm on a 4 foot tall rock that sits in front of the barn.


I’m waiting for my inspiration to overcome my laziness before I tackle the “Next Project” What ever that may be?


Tuesday, April 26, 2011

Two plows from my collection the one on the right is a Brinly and the one on the left is a Gardenaid


Friday, April 8, 2011

A note from a friend.

A friend of mine sent me this. It doesn't replace the original 10 but they are good ideas.

NEW COMMANDMANTS                                                                                                                                                      
Someone has written these beautiful words one must read to understand the deep meanings in them.                                                                      
They are like the Ten Commandments to follow in life all the time.                                                                                                    
1.   Prayer is not a "spare wheel" that you pull out when in trouble;                                                                                              
      it is a "steering wheel" that directs us in the right path throughout life.                                                                                   
2.  Do you know why a car's WINDSHIELD is so large & the rear view mirror is so small?                                                                              
     Because our PAST is not as important as our FUTURE. So, look ahead and move on.                                                                                
3.   Friendship is like a BOOK. It takes few seconds to burn, but it takes years to write.                                                                          
4.  All things in life are temporary. If going well enjoy it, they will not last forever.                                                                           
      If going wrong don't worry, they can't last long either.                                                                                                      
5.   Old friends are like Gold! New friends are Diamonds! If you get a Diamond, don't forget the Gold!                                                              
       Because to hold a Diamond, you always need a base of Gold!                                                                                                   
6.   Often when we lose hope and think this is the end, GOD smiles from above and says,                                                                             
       "Relax, sweetheart, it's just a bend, not the end!                                                                                                           
7.   When GOD solves your problems, you have faith in HIS abilities;                                                                                                
       when GOD doesn't solve your problems HE has faith in your abilities.                                                                                         
8.   A blind person asked St. Anthony: "Can there be anything worse than losing eye sight?"                                                                         
       He replied: "Yes, losing your vision."                                                                                                                       
9.   When you pray for others, God listens to you and blesses them; and sometimes,                                                                                  
       when you are safe and happy, remember that someone has prayed for you.                                                                                       
10.   WORRYING does not take away tomorrow's TROUBLES; it takes away today's PEACE.                                                                                  
 If you really enjoy this, PLEASE pass to others. It may brighten someone's day...                                                                                  
 Praying for love and peace to fill the coming NEW Year.                                                                                                            
Be kinder than necessary, for everyone you meet is fighting some kind of battle. Live simply, love generously, care deeply, speak kindly, and leave the rest to God. 


Tuesday, April 5, 2011

Sharpening a Barn Auger


In response to a question of why an auger would only cut 1/4" deep before strippng out the pilot thread. I've taken an auger that was in extremely rough shape and brought it back to usable. Make boring an 1 1/4" hole quick and simple. No cord, no batteries, faster than setting up with power tools, and can work underwater. Well okay you might not want to but it will work!

Saturday, March 26, 2011

Rust Hunt

I had to work today so I treated myself to a trip to Mason, Michigan. I didn’t go further than down Peddlers Row but I managed to pick up a rather interesting chisel, stamped I. Sorby Sheffield, a looong 1” dia Irwin style barn auger bit, and some candidates for the chisel repair pile.


The bottom chisel is the I. Sorby.


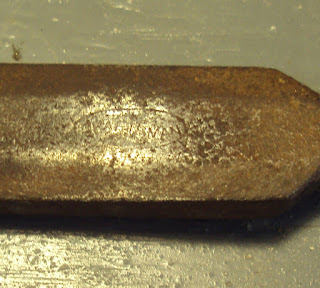
I'm not sure what the makers mark is. On the butt of the handle it's stamped "Indestructible".


If you have an idea what the makers mark is I'd appreciate it if you would let me know.

The socket chisel is a Craftsman. It's pretty well beat up but maybe the socket can be reforged.


The chisel just above the auger is a Millers Tool Steel. The tang has been hit a few times but not too bad.

Last and least, the top gouge has the tip broken off and the name is corroded down to just a "C".

Four chisels, three with names, not bad for $2.00.

The auger is an Irwin style bit. No name on the shank. The handle on it was "adapted" in other words driven onto the shank of the bit. Augers are my favorites so I'll sharpen it up and try to rebuild the handle. The handle is an adjustable type. It should have an eye bolt through the slot that the shank was driven through, with a wing nut on the end to tighten the shank into the handle.

In the back of one of the stalls I found a Stanley No. 358 miter box. What I thought was a rare item. A quick check on the net shows it's not that rare and the price was too high for a miter box without a blade.


The Work-Mate that it's sitting on is pretty good but I already have three. 

A great way to spend an afternoon.


Saved

Friday, March 25, 2011

Barn Auger II Why do augers have different pitch threads on the pilot screw.


In this and the next video we'll test the effect of pilot thread pitch on how a wood cutting auger works.

Wednesday, March 16, 2011

Champion Blower


In my travels I picked up a Champion Blower. Looks to have come from a rivet forge. Missing the handle but it's in good shape with only 1 farmer fix. It has a socket head cap screw in the blade. Pretty sure those weren't around when this was made.
Not sure if I'll use it or sell it but at the price I couldn't leave it.

Patience Pays Off


Tonight I went out to the shop to oil and tap the shaft again.
When I tapped the end it moved.
Now all I have to do is file off the setscrew marks and a little burr on the end and it will come right out.
Could have been the heat I put on the nut. Could have been the heat on the shaft. Could have been the Kroil. (I love the stuff.)
Bet it was the patience.

Thanks for all the ideas guys. If the shaft hadn't slipped loose tonight it was off with the end and drill it out this weekend.

Now where did I put the wood for the frame?

Monday, March 14, 2011

Treadle Grinder

After a year of patient waiting, oiling, tapping, waiting again, I finally have the cranks off of the treadle grind stone and shaft that I picked up. My intent was to quickly build a stand and treadles, jump on the seat and Bob’s yer uncle.
Alas it was not to be. When I got off the poor bedraggled bearings, that someone had butchered onto the shaft, I found that the shaft is severely worn. My lathe has a 9” swing over the bed and the stone is 20” diameter so just chucking up the shaft is not easily accomplished. No problem I’ll just remove the shaft and weld it up. Turning it in the lathe will be a snap right? More oiling an tapping. Patience is rapidly becoming a scarce commodity.
I'm looking for someone with experience remove grindstone shafts. The shaft is of minor consequence if need be I'll drill the thing out and put in a new shaft but I'm concerned about damaging the stone.
Anyone with an idea just drop me a line.

Sunday, March 6, 2011

Restoring a Hocking Cornsheller - The end of a 52 year search

Written Thursday, July 01, 2010

When I was seven years old my parent bought their first house. We moved
in in October. It was a fixer-upper, by that I mean we spent a week
hauling out trash from the house, and Dad spent 4 years fixing it. I
learned a lot about home repair while helping my Dad install plumbing,
wiring, a fuel oil furnace, and a bathroom. The toilet was originally
in the living room closet and the sink was 40 feet away by the back
door. We also learned togetherness as a family that first winter,
because we all tried to huddle as close to the living room stove as
possible while turning to keep one side from burning while the other
side froze. That first winter my brothers and I hauled lump coal in
from the tumbledown shed by the back door in to feed the potbellied
stove in the kitchen and living room. The end of the shed with the door
had folded down flat so we entered through a hole we made in the wall
by pulling some boards off. By spring we had pretty well emptied the
coal shed. In the back of the shed we found a corn sheller. Bob ,
Jerry, and I ran field corn and walnuts through it and had great fun
cranking the handle while the wheel turned and corn magically came out
the bottom and the cob was spit out the end.

The outbuildings were full of old tools and farm equipment. Dad needed
money more than he needed old tools so he sold all of them off,
including the corn sheller. The money went to buy the oil furnace so I
guess it was a fair trade.

Over the years that corn sheller became something that I really wanted
to have. I'm a Galoot, freely admitted. I wanted one but could never
justify buying one at the prices people thought they were worth. Every
auction with a corn sheller either was too far away or the price jumped
right over $200.00 and out of the range I was willing to part with.

In the fall of 2009 I went to another auction. This time to buy a trunk
for my wife. She had wanted one as a storage place for afghans and
blankets in the family room. While there I saw a fixer-upper of a corn
sheller. http://galootcentral.com/index.php?option=com_copperminevis&It-
emid=2&place=displayimage&album=484&pos=0

http://galootcentral.com/index.php?option=com_copperminevis&Itemid=2&pl-
ace=displayimage&album=484&pos=1

In the family tradition it was full of trash and was going to take a
lot of work to make it right, but all the iron was there. I carefully
didn't look at it much, and when the bidding time came I bid $15.00 and
it was mine.

After 6 months of off and on work at night and on weekends it's done.

http://galootcentral.com/index.php?option=com_copperminevis&Itemid=2&pl-
ace=displayimage&album=484&pos=2

After finally getting all the parts together on Saturday (July 25th, 2010), I
spent Sunday cranking the handle, smiling, and remembering. This
ones not for sale.


Sunday, January 30, 2011


Union City is on the St Joe River, which is a good bow shot from my front porch. My wife Lydia, son Ryan, and I live in a farmhouse built in 1891, with our cat named Gabby and Saidie the dog. I spend my time mostly at work and when I can, in my workshop rebuilding tractors or old farm implements, making the occasional piece of furniture, or just thinking about the next project. My Dad started me on using old tools when I was about three, by giving me his worn out ones so I wouldn't use his electric drill to put holes in the yard. My brothers and I spent many a day augering holes in fence posts, trees, and of course the ground with an old brace and bit. We could have all the bent nails that we wanted and any scrap lumber that was lying around
was quickly stripped of bent nails, and after straightening the nails, converted into go carts, tree houses, boats, or whatever the three of us could think of.

I stayed with the old tools but I have bought a fair amount of "Tailed Devils" also. So now I build bigger houses and create bigger carts and boats. As the old saying goes "The only difference between men and boys is the size of their toys"

Depending on where the money was I've worked as an electrician, carpenter, welder, plumber, engineer, and manager. The skills I picked up from some of my different jobs have allowed me to play at all these things while someone else foots the bill. My favorite place to be is in a converted 2 story hog barn, no there weren't any hogs on the 2nd floor, that with stubborn determination, "No I won't burn it down, or tear it down it's mine d*mn*t", where I keep my
collection of old and new tools handy for the occasional use in restoring old tractors, creating toys, building hay wagons, restoring my 1946 Ford 3 Ton truck, restoring antique furniture, rock carving, blacksmithing, and in general fiddling around.

Blacksmithing is kind of the beginning and end of the circle. It takes me back to working with old tools like my forge, anvil, and post vice, while leading me on to new ideas and concepts of decorative artwork and the practical touches of hinges, hooks, and hardware for my woodworking projects.

I'll never be monetarily rich from the results of my blacksmith work, but my wife is proud to show the bird baths, trellises, and rustic artwork, both wood and steel, that I've made. Outside of family presents, my sister has sold a few things at her green house, so the respect I gain is well worth the time spent playing.